
In an era where data is considered the new oil, the healthcare industry is sitting on a treasure tro...


As our team began working on Optimizely, we began to see the need for a bulk publishing page similar to some other CMS’s we’ve worked on. A page where a content admin, someone without programming experience, could select a page and items of certain content types and publish that item with all its descendants.
Doing so allows for quick mass publishing while maintaining control over what items would be published.
First, you’ll want to set a custom admin page (for example, take a look at this article Extending The Admin Interface in Optimizely CMS 12 by Mark Stott when setting this up).
Recommendation: When setting up a custom admin page, it’s recommended you restrict the access of who can access the publishing tool, as the desired tool would ignore regular publishing restrictions for the ease of bulk publishing.
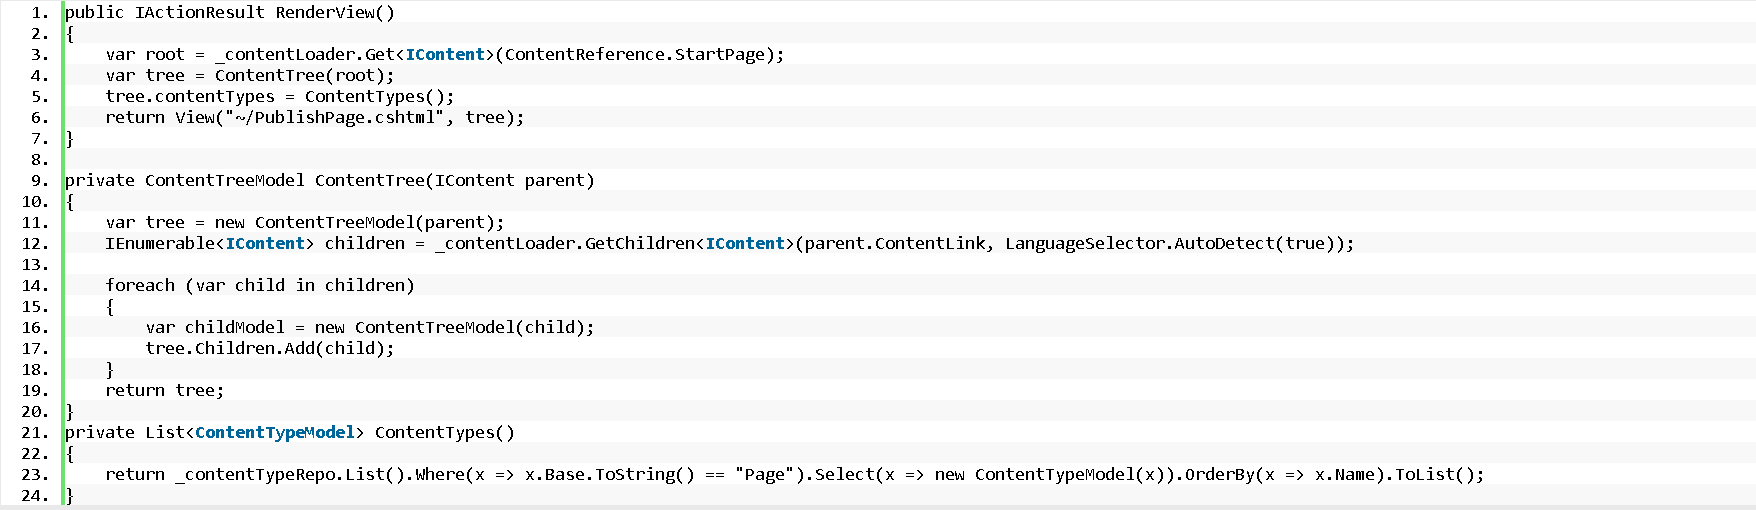
After you set up the custom admin page, you’ll want to find a way to display all the items to publish.
In our case we ended up using a content tree with a structure similar to Optimizely’s content tree. You should load the ContentLoader and ContentTypeRepo according to best practices into the code that you are working on.
Note: You can use the ContentTypeRepo.List() to get a list of ContentTypes, and you can load the Starting point of the tree and use ContentLoader.GetChildren() to get the children of the starting point. We only loaded the first set of children and not the entire content tree as we found performance issues as our site grew bigger and noted that we needed to load the children dynamically.
Following the above steps, your page should now have a content tree and a list of content types.
The next step is to trigger a way to publish.
We decided to run this in the background to meet with our site demands, but you could attempt doing it real-time if your site is small enough, or you can limit when you are publishing.
To start, you need to create a file that can trigger a job using the ScheduledJobRepo, ScheduledJobExecutor and ContentRepo.
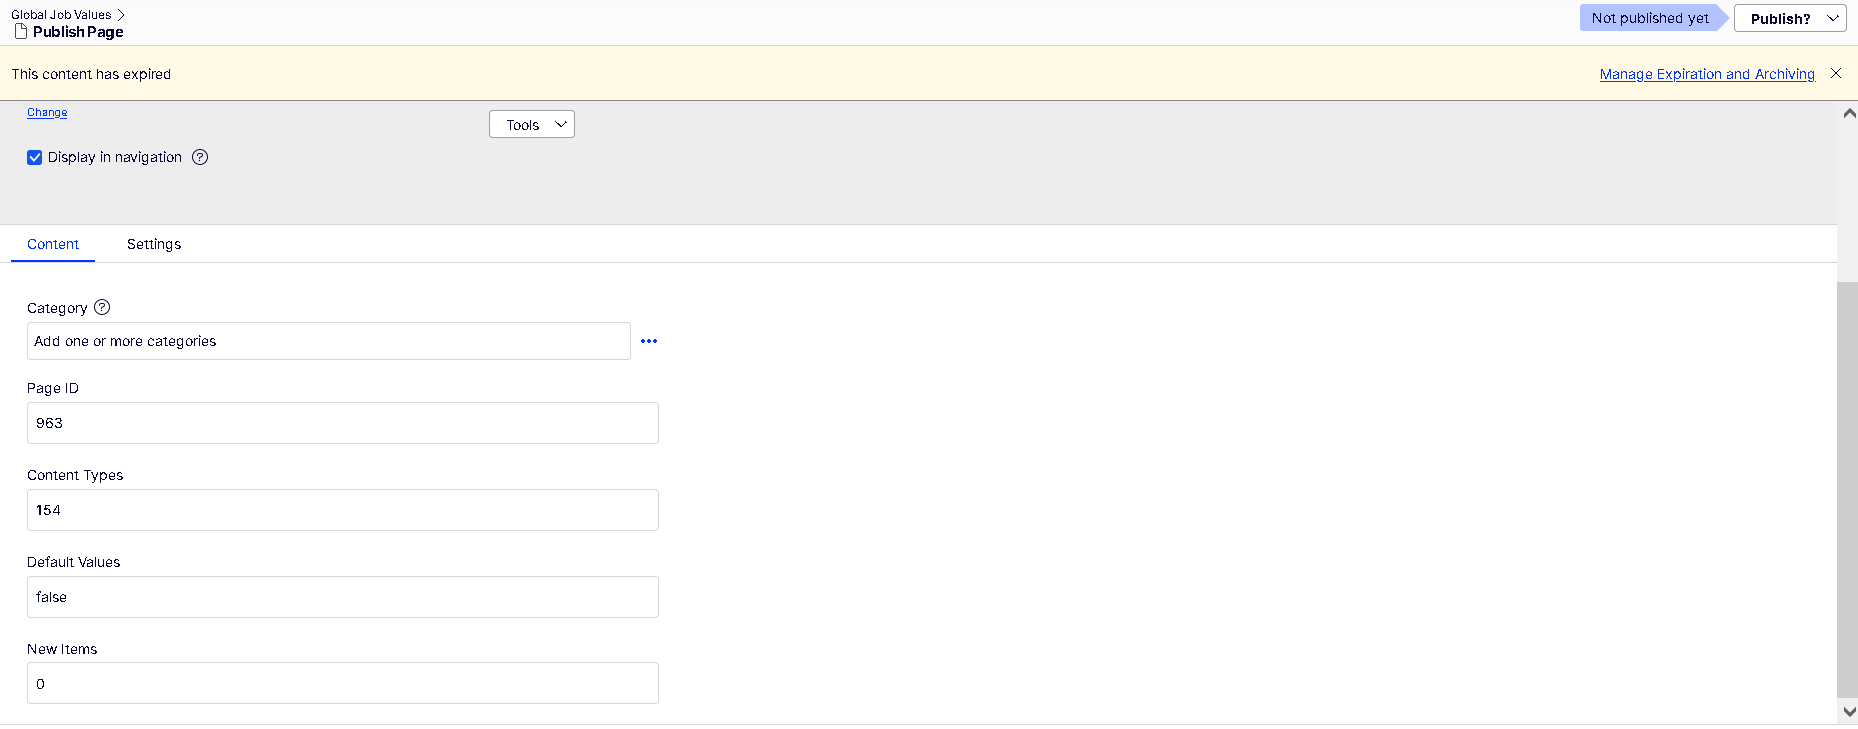
Following this step, on Optimizely you should create an item that will contain the info that you need.
For example:
It’s recommended you at least have something to hold the content type IDs and the starting page. You’ll want to create a new job for the Repo and Executor Job repos to call from.
Tip: This Scheduled Jobs page by Optimizely goes over how to create a scheduled job.
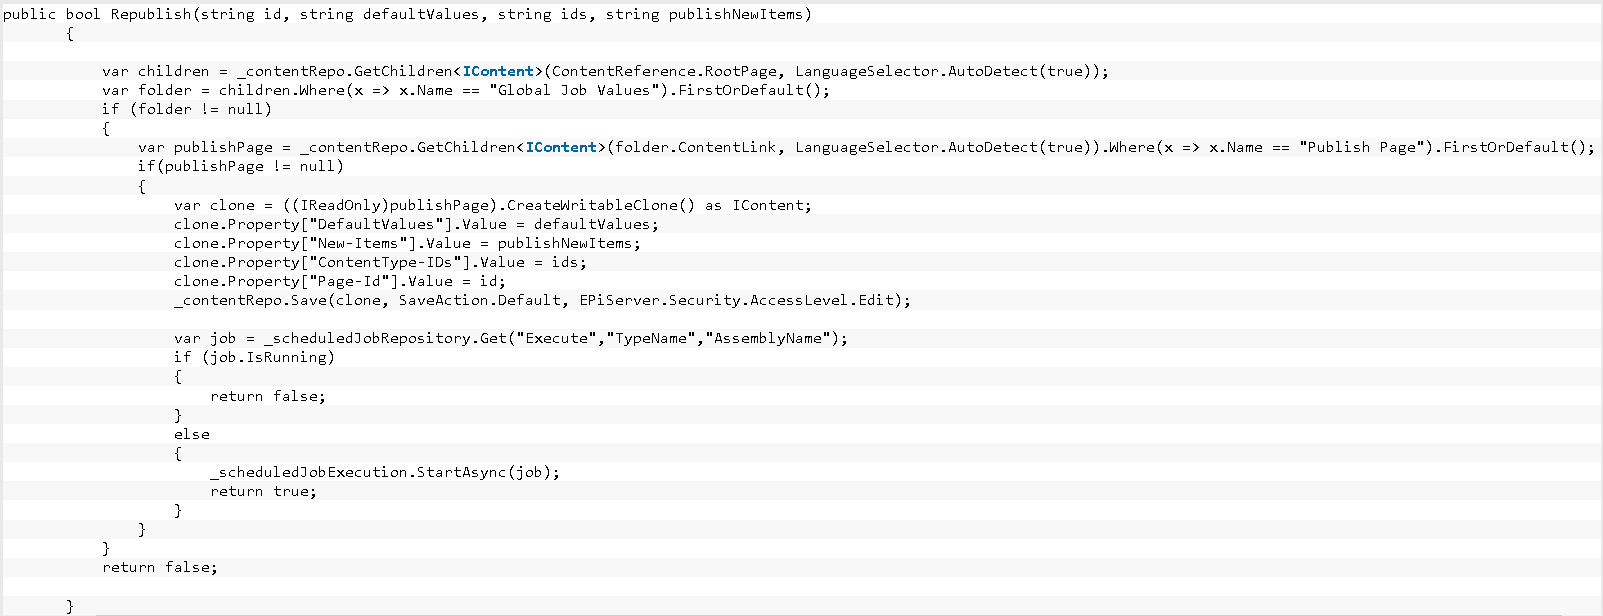
Once this page is created, you’ll want to first save the info to the appropriate page by using the content repo, then call the new job that you created like so:
The scheduled job repo is used to get the information using the Type Name and Assembly Name in the code where it is defined. Once it is retrieved, you’ll want to check that it is running then use the Scheduled Job Execution Repo to start the job.
Now that we have a way of starting the job, we lastly want to define the job.
First, in the Job file, you’ll need to load in the ContentRepo and ContentVersionRepo.
Next, in the execute function, you’ll want to write the same logic as before to retrieve the Optimizely Page that holds the job information, except this time you are getting the field values instead of setting them.
After you have retrieved the information, you can write the code to start publishing.
You’ll want to get the Icontent of the last edited value of the defined start page. Afterwards you can pass that to the recursive file.
First, you’ll want to add a condition to check if the ContentTypeID matches one of the ones in the file.
You then want to Recursively call the function on all the children first.
This is useful for computed fields to publish bottom to the top, that way all the children are properly up to date before the parent is published.
Now it’s time to do the actual publishing.
Note: The ContentRepo by default only returns the latest published version of the master item, so in order to get the latest edited you’ll have to use the ContentVersionRepo which contains all saved versions of the master item.
Using the Icontent from ContentRepo, you can then use the contentReference to get a list of the Content Versions from the ContentVersionRepo. Then order by their saved date to get the latest saved one.

Next you can execute ContentRepo.Save, where you’ll want to specify action type and the access level.
For the purposes of creating a publish page, you’ll want the save action to be Publish as you are publishing the page and the access level to be AccessLevel.NoAccess. Without AccessLevel.NoAccess being set, you can run into various issues of being denied access to the item when trying to save or have validation stop you.
Despite what the name might seem, AccessLevel.NoAccess will allow you to override any access rights that may be in the way.
You should now have the job ready to publish.
You can then test to see if your code is working by triggering the job starting then checking the Scheduled Jobs is running.
Adding logs while the job is running is a useful tool to monitor performance and debugging and I strongly recommend it.
Now that you have a publish page you’ll be able to publish entire folders on the fly and can then add more customization in order to fit your need.